BloggerAds廣告聯播

Step 14:

tutorial-v5.0-13

Click Select File.

The standard file selector window should appear.


Step 15:

tutorial-v6.1-14

In the file selector, browse to the container file (which we created in Steps 6-11) and select it.

Click Open (in the file selector window).

The file selector window should disappear.

In the following steps, we will return to the main TrueCrypt window.


Step 16:

tutorial-v5.0-15

In the main TrueCrypt window, click Mount.

Password prompt dialog window should appear.


Step 17:

tutorial-v5.0-15

Type the password (which you specified in Step 10) in the password input field (marked with a red rectangle).


Next Part >>>

CKlattice 發表在 痞客邦 留言(0) 人氣()

Step 7:

tutorial-v5.0-05

In the Volume Creation Wizard window, click Next.


Step 8:

tutorial-v5.0-06

Here you can choose an encryption algorithm and a hash algorithm for the volume. If you are not sure what to select here, you can use the default settings and click Next (for more information, see chapters Encryption Algorithms and Hash Algorithms).


Step 9:

tutorial-v6.1-07

Here we specify that we wish the size of our TrueCrypt container to be 1 megabyte. You may, of course, specify a different size. After you type the desired size in the input field (marked with a red rectangle), click Next.


Step 10:

tutorial-v5.0-08

This is one of the most important steps. Here you have to choose a good volume password.
Read carefully the information displayed in the Wizard window about what is considered a good password.

After you choose a good password, type it in the first input field. Then re-type it in the input field below the first one and click Next.

Note: The button Next will be disabled until passwords in both input fields are the same.

Next Page >>>

CKlattice 發表在 痞客邦 留言(0) 人氣()

Step 1:

If you have not done so, download and install TrueCrypt. Then launch TrueCrypt by double-clicking the file TrueCrypt.exe or by clicking the TrueCrypt shortcut in your Windows Start menu.

Step 2:

step 2

The main TrueCrypt window should appear. Click Create Volume (marked with a red rectangle for clarity).


Step 3:

tutorial-v6.1a-02

The TrueCrypt Volume Creation Wizard window should appear.

In this step you need to choose where you wish the TrueCrypt volume to be created. A TrueCrypt volume can reside in a file, which is also called container, in a partition or drive. In this tutorial, we will choose the first option and create a TrueCrypt volume within a file.

As the option is selected by default, you can just click Next.

Note: In the following steps, the screenshots will show only the right-hand part of the Wizard window.


Step 4:

tutorial-v5.0-02a

In this step you need to choose whether to create a standard or hidden TrueCrypt volume. In this tutorial, we will choose the former option and create a standard TrueCrypt volume.

As the option is selected by default, you can just click Next.


Step 5:

tutorial-v5.0-03

In this step you have to specify where you wish the TrueCrypt volume (file container) to be created. Note that a TrueCrypt container is just like any normal file. It can be, for example, moved or deleted as any normal file. It also needs a filename, which you will choose in the next step.

Click Select File.

The standard Windows file selector should appear (while the window of the TrueCrypt Volume Creation Wizard remains open in the background).


Step 6:

tutorial-v5.0-04

In this tutorial, we will create our TrueCrypt volume in the folder D:\My Documents\ and the filename of the volume (container) will be My Volume (as can be seen in the screenshot above). You may, of course, choose any other filename and location you like (for example, on a USB memory stick). Note that the file My Volume does not exist yet – TrueCrypt will create it.

IMPORTANT: Note that TrueCrypt will not encrypt any existing files (when creating a TrueCrypt file container). If you select an existing file in this step, it will be overwritten and replaced by the newly created volume (so the overwritten file will be lost, not encrypted). You will be able to encrypt existing files (later on) by moving them to the TrueCrypt volume that we are creating now.*

Select the desired path (where you wish the container to be created) in the file selector.

Type the desired container filename in the File name box.

Click Save.

The file selector window should disappear.

In the following steps, we will return to the TrueCrypt Volume Creation Wizard.


* Note that after you copy existing unencrypted files to a TrueCrypt volume, you should securely erase (wipe) the original unencrypted files. There are software tools that can be used for the purpose of secure erasure (many of them are free).


Next Part >>>

CKlattice 發表在 痞客邦 留言(0) 人氣()

http://adf.ly/291415/banner/http://ikemanchen.pixnet.net/blog/trackback/bb36673302/34618565

CKlattice 發表在 痞客邦 留言(0) 人氣()

她——只是一位年輕的小姑娘,想像不到她會寫出這一番體會:


“別問是劫是緣。感恩地離去,微笑著想起,將愛進行到底,不是你不夠好,是生命需要更多的體驗,來完成它深邃而淡定的使命。讓我們和他一起來面對這一切,分享生命中的糾結、不快和開心幸福時刻!”

“學會承受痛苦。 有些話,適合爛在心裏,有些痛苦,適合無聲無息的忘記。 當經歷過,你成長了,自己知道就好。 很多改變, 不需要你自己說, 別人會看得到。”

CKlattice 發表在 痞客邦 留言(0) 人氣()

MACD是根據移動平均線較易掌握趨勢變動的方向之優點所發展出來的,它是利用二條不同速度(一條變動的速率快──短期的移動平均線,另一條較慢──長期的移動平均線)的指數平滑移動平均線來計算二者之間的差離狀況(DIF)作為研判行情的基礎,然後再求取其DIF之9日平滑移動平均線,即MACD線。MACD實際就是運用快速與慢速移動平均線聚合與分離的征兆,來研判買進與賣進的時機和訊號。


1.MACD的基本運用方法

  MACD在應用上,是以12日為快速移動平均線(12日EMA),而以26日為慢速移動平均線(26日EMA),首先計算出此兩條移動平均線數值再計算出兩者數值間的差離值,即差離值(DIF)=12日EMA-26日EMA。然後根據此差離值,計算9日EMA值(即為MACD值);將DIF與MACD值分別繪出線條,然後依「交錯分析法」分析,當DIF線向上突破MACD平滑線即為漲勢確認之點,也就是買入訊號。反之,當DIF線向下跌破MACD平滑線時,即為跌勢確認之點,也就是賣出訊號。
  MACD理論除了用以確認中期漲勢或跌勢之外,同時也可用來判別短期反轉點。在圖形中,可觀察DIF與MACD兩條線之間長間垂直距離的直線柱狀體(其直線棒的算法很簡單,只要將DIF線減去MACD線即得)。當直線棒由大開始變小,即為賣出訊號,當直線棒由最小(負數的最大)開始變大,即為買進訊號。因此我們可依據直線棒研判短期的反轉點。
  一般而言,在持續的漲勢中,12日EMA在26日EMA之上,其間的正差離值(+DIF)會愈來愈大。反之,在跌勢中,差離值可能變負(-DIF),負差離值也愈來愈大,所以當行情開始反轉時,正或負差離值將會縮小。MACD理論,即利用正負差離值將會縮小。MACD理論,即利用正負差離值與其9日平滑均線的相交點,作為判斷買賣訊號的依據。


2.研判

  (1)DIF與MACD在0以上,大勢屬多頭市場。DIF向上突破MACD可作點交叉向下,只能看作行情的回檔,不能看成空頭市場的開始。
  (2)反之,DIF與MACD在0以下,大勢屬空頭市場。DIF向下跌破MACD,可作賣,若DIF向上突破MACD,是高價位拋售股東的股檔的回補現象,也可看作少數投資者在低價位試探著去接手,只適合買入走短線。
  (3)牛差離:股價出現二或三個近期低點,而MACD並不配合出現新低點,可作買;
  (4)熊差高:股價出現二或三個近期高點而MACD並不配合新高點,可作賣;
  (5)MACD可配合RSI(相對強弱指數)與KD(隨機指數),互相彌補各自的缺點;
  (6)高檔二次向下交叉要大跌,低檔二次向上交叉要大漲。
  

3.評價


  MACD技術分析,運用DIF線與MACD線之相交型態及直線棒高低點與背離現象,作為買賣訊號,尤其當市場股價走勢呈一較為明確波段趨勢時,MACD則可發揮其應有的功能,但當市場呈牛皮盤整格局,股價不上不下時,MACD買賣訊號較不明顯。當用MACD作分析時,亦可運用其他的技術分析指標如短期K,D圖形作為輔助工具,而且也可對買賣訊號作雙重的確認。


CKlattice 發表在 痞客邦 留言(0) 人氣()

Apple keyboard 一樣能應用 Windows XP, Windows Vista 和 Windows 7 上!
只是某些在 Window 上可用的 function key 都套用不了。

目前我只能找到最簡約的程式,使 apple keyboard 上的 F key 用套用 Window 的的function key.


AppleKeyboard


    安裝登錄檔後重開電腦:
    F13 will become INSERT 
    F14 will become Windows Context Menu scancode
    F15 will become PRINT SCREEN
    F19 will become MUTE toggle scancode

   Download Now >

CKlattice 發表在 痞客邦 留言(1) 人氣()

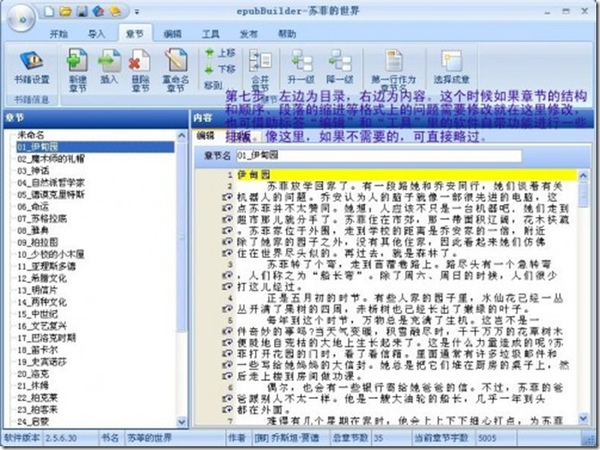
在PC上安裝好epubBuilder,打開軟體,如圖。(圖片文字說明看不清楚的請點擊圖片看大圖。)
1

2

3

4

5

6

7

如何将epub格式电子书导入到iPad。

8

9

99

45

原帖请参考:http://blog../archives/2021


CKlattice 發表在 痞客邦 留言(0) 人氣()

註冊中醫師楊明霞稱,新年若吃太多煎炸「熱氣」食物,有的人較易喉痛,即俗稱的「上火」。「上火」也是「作感冒」的先兆,處理不宜便容易感冒。

中醫所指的感冒,與西醫所稱由流感病毒引起的感冒不同。她稱,「熱氣」食物可導致脾胃濕熱或肺熱,使身體容易積熱,從而導致中醫所指的「風熱感冒」。除了燥熱食物,勞累及外感也會引起「風熱感冒」。

跟「風熱感冒」相反的是「風寒感冒」,是由於平素體質虛弱受涼引起。兩種感冒的病徵各有不同﹕

風熱感冒﹕吞口水時有異物感、喉痛;感到時冷時熱、怕風;喉乾、鼻乾、皮膚乾;大便乾澀,小便偏黃

風寒感冒﹕沒有喉痛,吞口水時沒有異物感;怕冷,大便易瀉,小便清長

楊明霞表示,病因不同,療法也異。

滋陰減虛火 薑水驅風寒

身體積熱有「虛實」之分,想避免因吃煎炸食物引起「虛火」(病徵有喉痛、喉乾及鼻乾)繼而感冒,事前應多喝白開水或滋潤的雪梨水、蜂蜜水,能滋陰清熱減虛火。如有時間,也可用雪梨1個、雪耳1朵加杏仁3錢燉兩小時進食(以上為一人分量)。由於雪梨的補益功效位於果皮與果肉之間,故要先把雪梨削皮,並連皮燉煮。此外,煲湯時加少許沙參、麥冬、玉竹及百合,也具滋潤作用。若有「實火」徵狀,即出現暗瘡、口苦、口氣及俗稱「飛滋」的痱子,可用金銀花5錢加菊花4錢,以攝氏80度的熱水焗一會後飲用;又或叩爛羅漢果1個以水浸泡10分鐘,再煮約20分鐘或至出味,加菊花兩錢飲用(以上為一人分量)。

至於風寒感冒,發病初期有少許鼻水或鼻塞,但吞口水時沒有異物感,也沒有喉痛,宜用2、3片生薑輕拍後加熱水焗一會後飲用,以驅風寒。有時間的話,把薑煮一會更佳。又或取青接近根部約一吋的位置兩段,加水略煮飲用,讓身體微微發汗也可。

若大眾不確定患上的是風熱還是風寒感冒,便不要貿然嘗試以上食療,以免服用錯誤反倒加重病情。

太飽鬱悶也會「作感冒」

此外,吃得太飽太滯也容易「作感冒」,故要由處理食滯入手。除了節制食量七分飽外,要避免過量進食蘿蔔糕或芋頭糕等五穀製作食品引起的食滯,可在進食前先以麥芽及穀芽各3錢煮水飲用;避免由肉食引起的食滯,可用山楂3錢及神曲兩塊煮水飲用,方法是把神曲先洗後泡10分鐘,再加山楂煮水至出味即可。

心情鬱悶「作感冒」的話,以6至8朵茉莉花,或玫瑰花及杭菊各3至4朵,加熱水成花茶飲用,有助疏肝解鬱。惟經血量過多的人不宜飲用玫瑰花茶,以免其活血功能令經血增加。

文﹕姜素婷

編輯:梁小玲

Credit:
http://www.mingpaohealth.com/cfm/feature3.cfm?File=20110214/hefe/vna1.txt

CKlattice 發表在 痞客邦 留言(0) 人氣()

Aimersoft公司出品的這款iPhone Video Converter視頻轉換工具能將音頻、視頻檔轉換為iPhone/iPod/AppleTV所支援的格式,功能十分強大,可以將AVI、MPEG、WMV、FLV、MOV、MP4、VOB、XviD、WMA、ASF、3GP、MP3格式的檔轉換為iPhone使用的MP4、M4A、MP3等格式,同時還支持批量轉換。軟體還提供了一系列的視頻編輯功能,例如:隨意調整尺寸大小;視頻剪輯;亮度、對比度、飽和度以及特效調整等。視頻設置選項也十分豐富,可調整解析度、比特率、幀數、高寬比,當然,你也可以使用默認設置,軟體介面很漂亮,使用也非常簡單,推薦大家使用。


未命名

CKlattice 發表在 痞客邦 留言(0) 人氣()